 Setting Up Your APC UPS: Windows + Linux
Winter is coming fast and we all know that during a windy day there are a lot of chances of you (or me) being left in the dark because either a tree fell over the electric wires in your neighbourhood or worse: your town is left in the dark for a few hours (let’s hope it’s not days).
For this I bought myself an APC UPS backup. The model I bought is the UPS APC Back-UPS ES, 700VA/405W Power-Saving.

APC UPS 700
This UPS has 8 SCHUKO outlets: 4 have surge protection + battery backup and 4 have only surge protection. These last 4 outlets won’t be powered if the main electrical power is down.
Installation is very easy. All you have to do is to plug it in one of your wall outlet, let it charge for at least 12 hours before using it. After just plug in what you want to have spare power for. I chose my server, modem, router and printer. I also have an USB hub connected to it and 2 laptops.
Setting it up on Windows is very easy. All you have to do is to install the Powerchute software which comes on a cd inside the package. If you don’t have this cd you can download Powerchute from APC’s website: http://www.apc.com/shop/ro/en/products/APC-Power-Saving-Back-UPS-ES-8-Outlet-700VA-230V-CEE-7-7/P-BE700G-GR#software. Just plug in the cable to one of your computer’s USB port and the other end to the data port on the UPS. From Powerchute you can set some things up and monitor your UPS.
Monitoring your UPS from a linux machine can also be done. Installation on my ubuntu server machine went pretty easy. All I had to do was to install apcupsd:
sudo apt-get install apcupsd
and then edit 2 files:
pico /etc/default/apcupsd
change ISCONFIGURED=yes and
pico /etc/apcupsd/apcupsd.conf
and set the following:
- UPSNAME to the name you want
- UPSCABLE usb
- UPSTYPE usb
- and comment the line with DEVICE with a #
- set NETSERVER on if you want to monitor the UPS from another machine on your network
It’s now time to test things up before going further. Start with the apcaccess command and see if details about your UPS are shown. If not go back to editing /etc/apcupsd/apcupsd.conf and see if you set everything correctly.
Let’s also install the APCUPSD-CGI web interface.
sudo apt-get -y install apcupsd-cgi
This should now create several files into /usr/lib/cgi-bin/apcupsd. For this to work you must have CGI enabled in your Apache configuration and the CGI directory should be pointed at /usr/lib/cgi-bin/. To enable cgi on my Ubuntu server all I had to do is:
a2enmod cgi
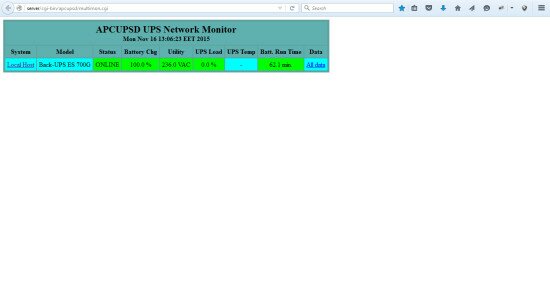
Restarted apache and went to this web address: http://ip.address.of.my.server/cgi-bin/apcupsd/multimon.cgi
and on the UPS status page:


